
New Domain Instruction
When your new website is looking good and ready to go “Live”, it’s time to connect your own domain name to it (example, YourRestaurant.com).
Your domain name registration will remain with whichever company you purchased your domain from. Restaurant Engine does not offer domain registrations. If you haven’t purchased a domain name yet, we recommend you purchase one from Godaddy.
To connect your domain to your website, we’ll need to tell your domain to point to our servers. Follow our instructions below to complete this process. We also have an FAQ for all this domain stuff, as well.
There are two ways we can do this:
- Method 1: (Fastest/Easiest) Let us connect your domain name for you (no extra charge)
- Method 2: You connect your domain by editing a CNAME in your Domain DNS (if you’re not sure what this means, we recommend method 1)
Method 1: Let us connect your domain for you (easy, free)
It’s a bit technical, but don’t worry. We will handle this process for you, and it should only take up to 1 business day to complete.
To get started, just go to your Account area and click “Connect a Domain“. OR, inside your website dashboard, go to Website Options > Connect Your Domain.
Simply fill out this secure form and we get started on connecting your domain for you.
We will require temporary login access (username and password) to the place where you purchased your domain from (Godaddy, Namecheap, etc.), as we will need to modify your DNS settings. After we’re finished, you can change or reset your password if you want.
Method 2: You connect your domain (edit your DNS)
If you’d prefer not to give us temporary access to where your domain is registered, and you’re comfortable with making changes to your domain DNS, then follow these instructions.
These are instructions for editing your DNS in Godaddy. If your domain is not registered at Godaddy, these instructions might vary a bit (ask for support from the company you purchased your domain from) or click on one of the links below that matches your registrar:
- Bluehost
- More coming soon
Step 1: Sign in to your Godaddy account https://www.godaddy.com/ and go to “Domains > Manage My Domains”
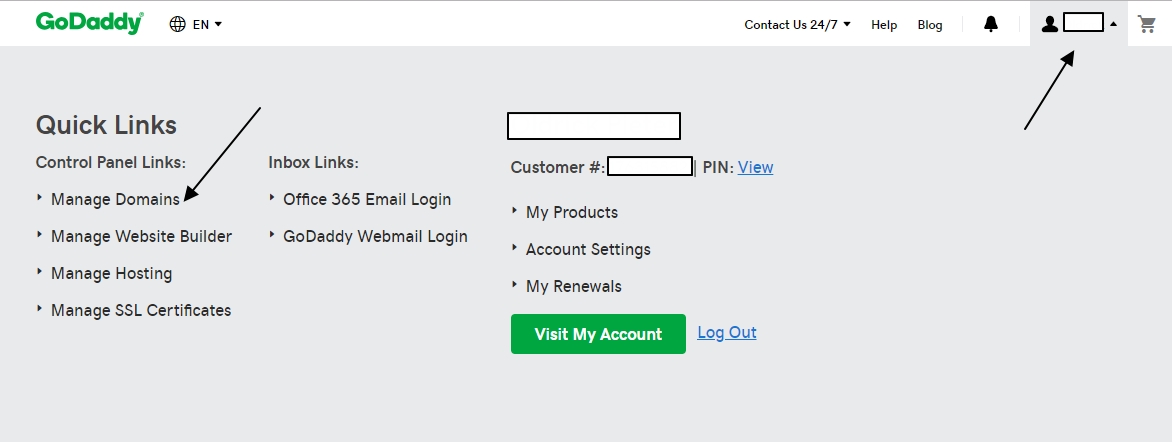
Step 2: In your list of domain names, look for the domain you want to use then click the “DNS” aligned on that domain.

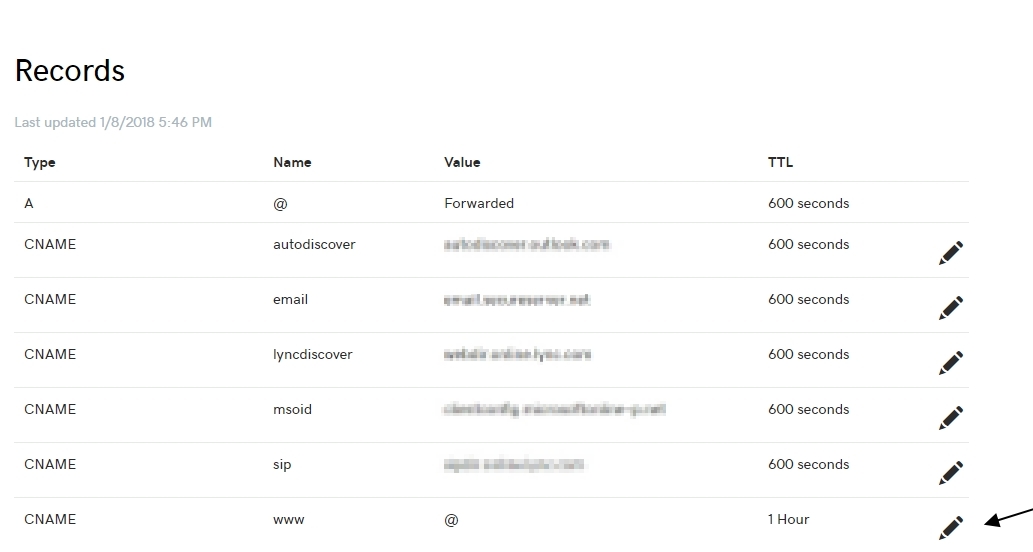
Step 3: Check for the CNAME type section, look for www name under CNAME type and click on the “Pencil icon” button to edit .
Note: If you are unable to edit/access this section, simply scroll down, look for Nameservers section and see if the nameservers are set to GoDaddy’s defaults (something like NS##.DOMAINCONTROL.COM). If NOT, click on “Change” under the Nameservers section and set new nameserver type to “Default”. Click on the Save button when you’re done. It might take a few seconds to a minute before you can fully access the DNS Zone File.
Step 4: Edit the CNAME for “www”
Point www to yourname.restaurantengine.com. Replace “yourname” so that it matches your temporary URL on Restaurant Engine. Do not include “http://”.

Step 5: Click “Save” button.
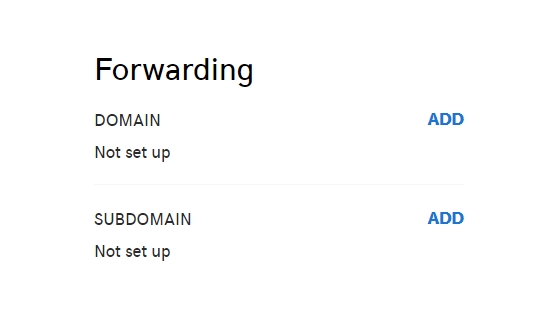
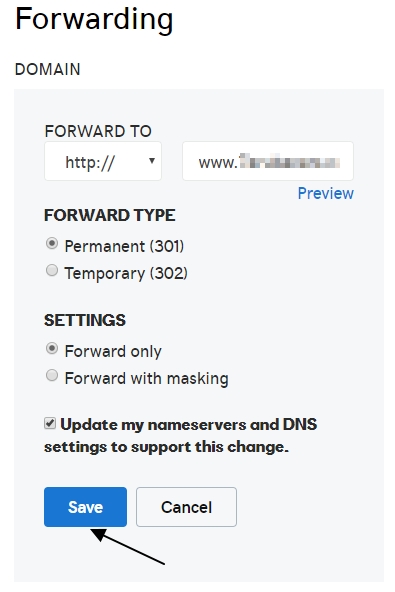
Step 6: Scroll down and look for “Forwarding” section click “Manage”.
Now we’re going make sure the non-www version redirects to the www version of your domain (so that all visitors see the same domain, your www version).
Note: If you’re not using GoDaddy, this part up to step 10 could be differently configured on your registrar. Please contact us first if you are having issues finding it.
Step 7: Click to “ADD” to add a new Forward
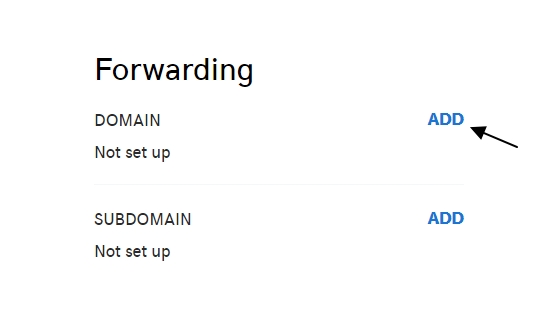
Step 8: Enter your domain name including the www (do not include http://). Don’t forget to check the checkbox “Update my nameservers and DNS settings to support this change”

Step 9: Click “Save”
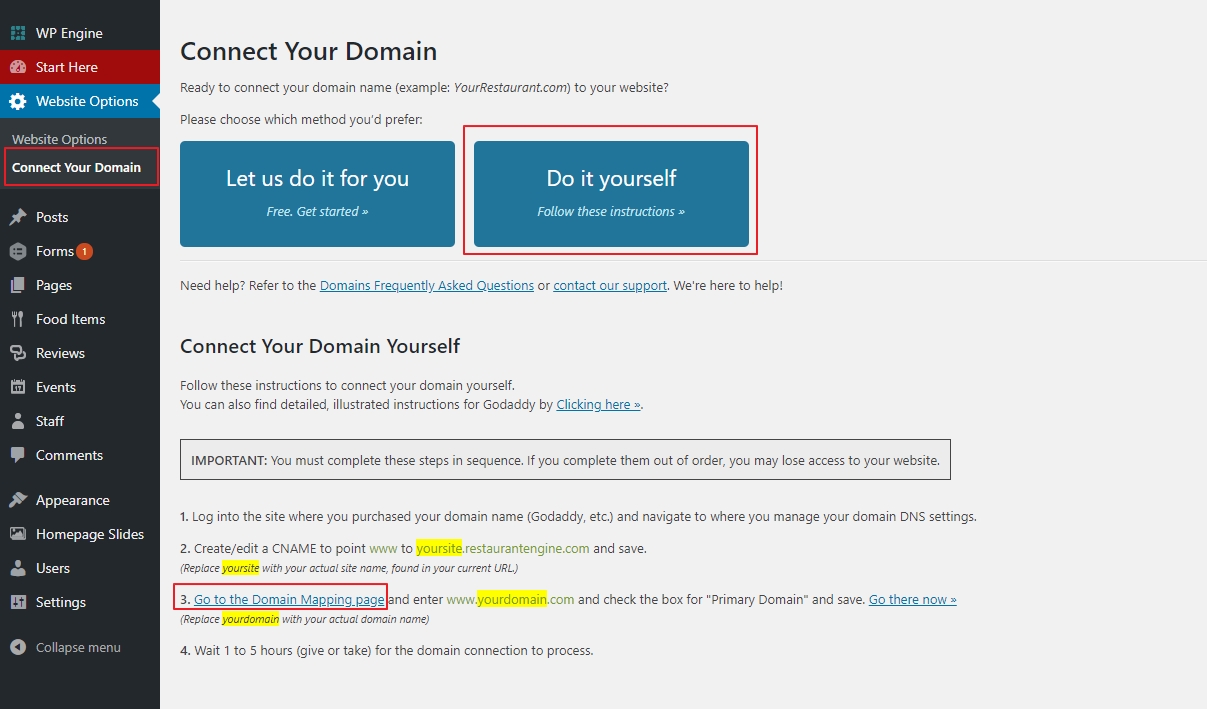
Step 10: Go back to your website dashboard on Restaurant Engine, and go to the Domain Mapping page
- Log into your website dashboard.
- Go to “Website Options” > “Connect Your Domain”
- Click the 2nd option, “Do it myself”
- Scroll down and click the link “Go to the Domain Mapping page”
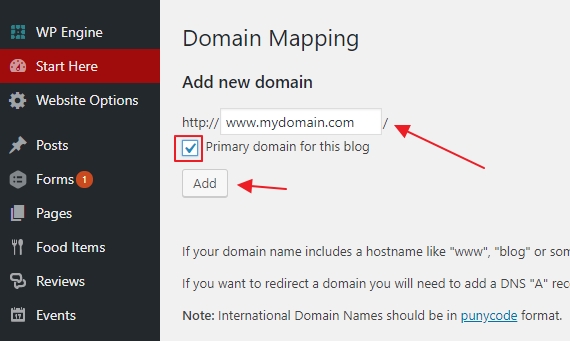
Step 11: Type your domain name, including www, and check the box for “Primary Domain”. Click “Add”.
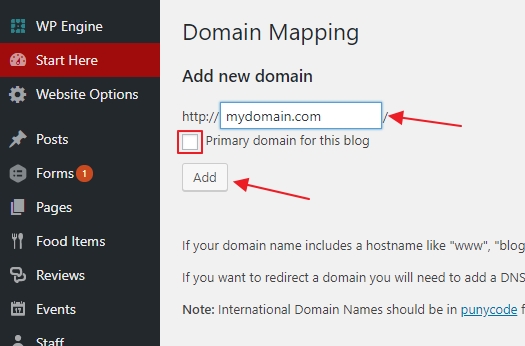
Step 12: Type your domain name again, this time without the www. This time, leave “Primary Domain” unchecked. Click “Add”.
Step 13: You will be logged out. You can log back in at the following URL:
http://www.yourdomain.com/login
Your live domain name is now connected. It still might take 1 to 5 hours for it to finish processing the update.