
Create a password-protected page
1.) Login to your website dashboard (go to yourwebsite.com/login)
2.) Navigate to “Pages > Add New”. This is where you’ll start to create a new page.
3.) Enter the page name/title and content in the provided boxes
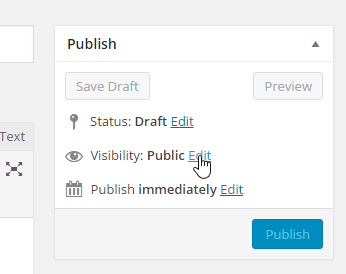
4.) In the “Publish” section, click the “Edit” link for “Visibility” status.
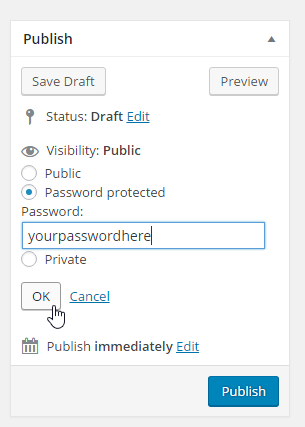
5.) In the radio buttons, select “Password protected”, set your password in the provided box, then click the “OK” button.
6.) When you’re done with the page, simply click the “Publish” button to save all your changes.
That’s it! You can now view the page in the front-end (website view) and it will ask you for the password the first time you access it before it displays the content of the page.
Note: Unless you clear your browser’s cache or you changed the page password from your website dashboard, the page will not ask you for the password again every time you view it after the first time.